Pollo Asado Peruano con Salsa Verde (Aji Verde)


 288 Comments


Mi primera experiencia con el verdadero pollo asado peruano fue en un pequeño asadero en la ciudad de Nueva York, donde los pollos enteros giran lentamente detrás del mostrador, el aire huele a comino y ajo, y cada pedido viene con una taza de salsa verde brillante. Un bocado de ese pollo ahumado y cítrico, untado en el picante y cremoso ají verde, y quedé enganchado. (Si alguna vez has estado en alguno de los establecimientos de pollo a la brasa peruano de Nueva York, sabes exactamente a qué me refiero).

La buena noticia: no necesitas un asador ni un boleto de avión. Un horno casero, unas cuantas especias de despensa, una licuadora y un termómetro inalámbrico para carne te acercan notablemente al sabor original.
Tabla de Contenidos
Los Dos Secretos: la Salsa y la Temperatura
La mayoría de la gente sabe que el pollo peruano vive y muere por su salsa verde. Es cierto, pero hay un segundo secreto que recibe mucha menos atención: la temperatura. Un pollo entero son en realidad dos cortes diferentes cocinados en el mismo ave. La pechuga magra (carne blanca) se seca en el momento en que se cocina demasiado, mientras que el muslo y la pata (carne oscura) necesitan más calor para ablandarse. Si solo te guías por el tiempo, casi siempre terminarás con una u otra parte demasiado cocida.

Si logras ambos, obtendrás carne blanca jugosa, carne oscura que se deshace y piel crujiente en todo momento. Volveremos a explicar cómo hacerlo exactamente a continuación.
Ingredientes
Esta receta rinde para un pollo de 4 libras (1.8 kg) con abundante salsa verde, y sirve para unas 4 personas. Todo es fácil de encontrar en un supermercado normal.
Para la marinada del pollo
Para la salsa verde (ají verde)
Una nota rápida sobre las compras
La mayoría de los ingredientes para esta receta, como el pollo, los limones, el cilantro y las especias básicas, se encuentran fácilmente en cualquier supermercado. Las únicas excepciones son la pasta de ají amarillo opcional, que se puede comprar en el pasillo internacional de grandes cadenas, en tiendas latinas o en línea, y el queso Cotija para la salsa verde, que se encuentra en la sección refrigerada de quesos latinos. Si no puedes encontrar el queso Cotija, el parmesano regular es un excelente sustituto diario.
Cómo Hacer Pollo Asado Peruano
1. Prepara la marinada: Bate el jugo de limón, el aceite de oliva, el ajo, el comino, el pimentón, el orégano, la sal, la pimienta y el azúcar (además del ají amarillo y/o la salsa de soja, si los usas) hasta obtener una mezcla suave.

2. Sazona el pollo (debajo de la piel): Seca completamente el pollo con toallas de papel y colócalo con la pechuga hacia arriba. Afloja suavemente la piel sobre la pechuga y los muslos con los dedos, con cuidado de no romperla. Unta aproximadamente dos tercios de la marinada debajo de la piel, directamente sobre la carne, y frota el tercio restante sobre el exterior y dentro de la cavidad. Poner la marinada debajo de la piel es lo que hace que el sabor sea similar al de la versión de restaurante, en lugar de una capa superficial.
3. Marina: Cubre y refrigera por al menos 6 horas, idealmente toda la noche. No apresures este paso porque de aquí proviene el sabor profundo.

4. Llevar a temperatura ambiente y precalentar: Saca el pollo unos 30 a 45 minutos antes de cocinar. Precalienta el horno a 425°F (220°C) con una rejilla en la posición inferior-media. Forra una bandeja para asar con papel de aluminio y coloca una rejilla encima.
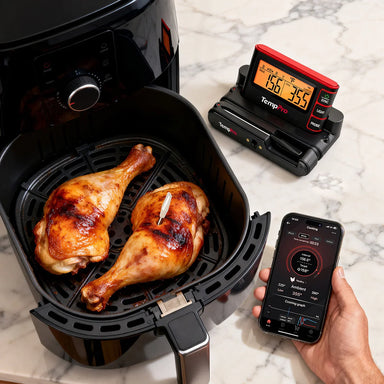
5. Inserta las sondas y asa: Coloca el pollo con la pechuga hacia arriba en la rejilla. Ata las patas si lo deseas. Inserta un termómetro inalámbrico de doble sonda, con una sonda en la parte más gruesa de la pechuga y la segunda en el muslo, sin tocar hueso. Ahora puedes ver cómo suben ambas lecturas en tu teléfono y retirarlas en su momento ideal. Asa a 425°F durante 20 minutos para fijar la piel. Baja el fuego y termina: Reduce el horno a 375°F (190°C) y continúa asando. Observa cómo suben ambas lecturas de la sonda. Si la piel se dora demasiado rápido, cúbrela holgadamente con papel de aluminio.

6. Retira a las temperaturas correctas: Este es el punto clave (guía de temperatura completa a continuación). Retira el pollo cuando la pechuga marque 160–165°F (71–74°C) y el muslo marque 170–175°F (77–79°C). Para una piel extra crujiente, usa el asador durante los últimos 2–3 minutos, pero vigílalo de cerca.
7. Reposar y luego trinchar: Cubre el pollo con papel de aluminio y déjalo reposar de 15 a 20 minutos. La temperatura seguirá subiendo ligeramente y los jugos se redistribuirán, por lo que la carne se mantendrá jugosa al cortarla. Trincha y sirve.

8. Prepara la salsa verde: Mientras el pollo se asa o reposa, combina todos los ingredientes de la salsa verde, excepto el aceite de oliva, en una licuadora y licúa hasta obtener una mezcla suave. Con el motor en marcha, añade el aceite de oliva en un chorro fino. Al principio parecerá líquida, pero espesará al reposar. Refrigera hasta el momento de servir.

Consejos para el Mejor Pollo Peruano
- Piel seca = piel crujiente: Seca el pollo a fondo antes de meterlo al horno, y no te saltes el inicio a alta temperatura de 425°F.
- Deshuesado para más rapidez: Si quieres que el pollo se cocine más rápido y de manera más uniforme, quítale la espina dorsal y aplánalo. El tiempo de cocción se reduce a unos 35-45 minutos; solo sigue vigilando las temperaturas de las sondas, ya que ellas te dirán cuándo está listo, no el reloj.
- Haz más salsa verde: Se conserva varios días en el frigorífico y transforma las sobras, los huevos, las patatas fritas y los sándwiches en algo especial.
- Déjalo reposar: Saltarse el reposo de 15 a 20 minutos es la forma más rápida de perder todos esos jugos en la tabla de cortar.
- Sírvelo de forma sencilla: El pollo peruano combina bien con guarniciones frescas y fáciles: patatas fritas crujientes o patatas asadas para mojar en salsa verde, una ensalada crujiente de lechuga, tomate y aguacate con lima, y arroz al vapor, yuca frita o plátanos machos, todo funciona maravillosamente.
Lleva el Asador a Casa
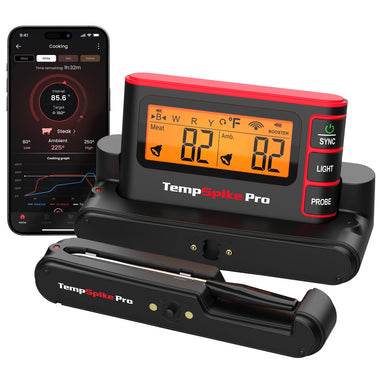
No necesitas un escaparate lleno de pollos giratorios para hacer un pollo tan bueno, todo lo que necesitas es una gran marinada, esa adictiva salsa verde y un control preciso de la temperatura. El termómetro inalámbrico para carne TempPro Twin TempSpike Plus TP972 elimina las conjeturas al rastrear la pechuga y el muslo al mismo tiempo, para que la carne blanca se mantenga jugosa y la carne oscura quede perfectamente tierna. Sin necesidad de abrir el horno, sin cocción excesiva.


Comentarios
También te puede interesar


Productos recomendados