5 astuces pour un magret de canard à la peau croustillante et à la chair tendre


 288 Comments


Pourquoi le magret de canard est facile à rater
Le magret de canard est délicat à préparer car il ne se comporte ni comme un steak ni comme une volaille. Il se situe entre les deux, et c'est précisément là que réside la difficulté. Si vous le traitez comme du poulet, la viande devient dure ; si vous le traitez comme un steak sans respecter sa couche épaisse de graisse, la peau devient molle et flasque. Si vous le ratez vraiment, vous vous retrouvez avec une belle croûte dorée à l'extérieur cachant une viande encore crue au milieu.

Le défi est de rechercher deux choses à la fois : une peau croustillante et bien rendue, et une chair qui reste tendre et juteuse. Ces deux objectifs tirent dans des directions différentes, c'est pourquoi le magret de canard a la réputation d'être exigeant. Il ne l'est pas, mais il demande du contrôle. Maîtrisez quelques principes fondamentaux et il deviendra l'une des choses les plus gratifiantes que vous puissiez cuisiner, voici donc les cinq qui comptent le plus.
Astuce 1 : Commencer dans une poêle froide, augmenter la chaleur lentement
Presque tout le monde commet la même première erreur : déposer le canard dans une poêle chaude. Avec le canard, vous voulez faire le contraire, en le commençant côté peau vers le bas dans une poêle froide. Cette épaisse couche de graisse sous la peau prend du temps à fondre, et un démarrage à la poêle froide lui donne ce temps, faisant fondre la graisse lentement à mesure que la poêle monte en température et vous laissant avec une peau dorée et crépitante au lieu d'une couche molle et grasse.
À partir de là, il s'agit de contrôler la chaleur plutôt que de la précipiter. Gardez une chaleur douce pendant que la graisse fond, car trop de chaleur trop tôt brûle la peau avant que la graisse ne soit partie, tandis que pas assez ne la rend jamais croustillante du tout. Une fois que la peau est rendue et dorée, augmentez légèrement la chaleur pour terminer. La patience à cette étape est ce qui vous donne une peau croustillante et une viande cuite uniformément, et cela prépare tout ce qui suit.
Astuce 2 : Entailler la peau, pas la viande
Une petite étape rend cette fonte bien plus efficace : entailler la peau avant de la mettre dans la poêle. Coupez un motif en croisillons peu profond à travers la peau et la graisse, en veillant à ne pas atteindre la viande en dessous. Ces entailles ouvrent des canaux pour que la graisse s'échappe en chauffant, de sorte qu'une plus grande partie fond et que la peau croustille comme vous le souhaitez.
Si vous omettez cette étape, la graisse reste emprisonnée, vous laissant lutter pour un croustillant que vous n'obtiendrez jamais vraiment. Cela semble un détail mineur, mais c'est l'une des plus grandes différences entre une peau molle et une peau incroyablement croustillante.
Astuce 3 : Cuire à la bonne température, pas à l'aveugle
C'est là que la plupart des magrets de canard sont perdus. La fenêtre entre une cuisson parfaite et une surcuisson est étroite, et si vous vous fiez à une minuterie, à la couleur ou au toucher, vous la manquerez généralement. Au moment où le canard semble cuit de l'extérieur, il est souvent déjà au-delà du point souhaité.
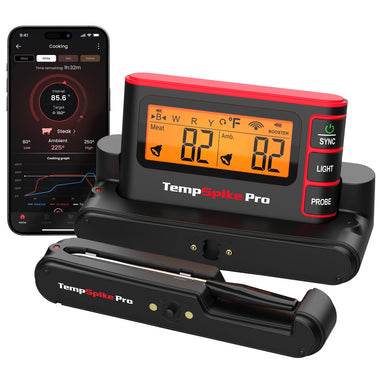
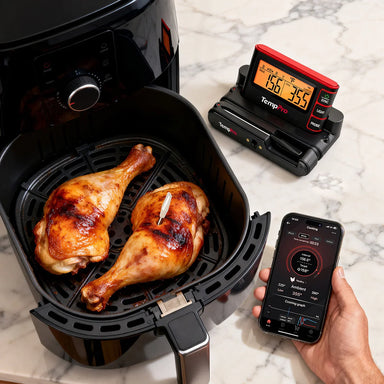
La seule façon fiable de passer par cette fenêtre est de cuire à une température interne, et le magret de canard a un objectif clair : 130 à 135 °F (54 à 57 °C) pour une cuisson saignante, ou 135 à 145 °F (57 à 63 °C) pour une cuisson à point. Si vous dépassez cette température, la viande devient ferme et sèche. Un thermomètre sans fil à laisser dedans comme le TempPro TP972 TempSpike Plus surveille cette température en continu pendant la cuisson du canard, afin que vous puissiez le voir monter vers votre objectif et le retirer au bon moment, sans ouvrir le four, sans couper, et sans deviner. Atteignez le bon chiffre et la texture se gère d'elle-même.

Astuce 4 : Laissez la graisse faire le travail
Pendant la cuisson du canard, une quantité surprenante de graisse fond dans la poêle, et l'instinct est de la verser. Ne le faites pas, du moins pas toute la graisse. Cette graisse chaude fait un travail utile, cuisant le magret plus uniformément et l'arrosant de saveur au fur et à mesure.
Au lieu de la vider, laissez le canard cuire dans la graisse qu'il dégage. Cela améliore à la fois la texture et le goût, et c'est un rappel que la gestion de la graisse fait autant partie de la cuisson que la gestion de la chaleur.
Astuce 5 : Reposer avant de trancher
La dernière étape est celle que les cuisiniers pressés sautent, et c'est là que tout prend sens. Dès la sortie du feu, les jus du canard sont poussés vers la surface, et si l'on coupe tout de suite, ils se répandent sur la planche au lieu de rester dans la viande.

Laissez-le reposer quelques minutes avant de le trancher. Cette courte pause permet aux jus de se réinstaller à travers le magret, de sorte que chaque tranche reste moelleuse et pleine de saveur. Sautez cette étape et vous annulez une grande partie du soin que vous avez apporté aux quatre premières étapes.
Une peau croustillante est une question de contrôle
La plupart des gens cuisinent le magret de canard sans véritable plan, se fiant au timing, à son apparence, ou à la façon dont ça s'est passé la dernière fois. Parfois, ça marche et parfois non, et cette incohérence est la raison pour laquelle le canard semble intimidant. Passez à la cuisson par température et cela devient complètement prévisible : vous savez quand la viande est cuite, vous savez quand la retirer, et vous savez exactement ce que vous allez obtenir.
Rien de tout cela ne relève d'une technique sophistiquée. C'est une question de patience et de précision : contrôler la chaleur, travailler avec la graisse et suivre la température pour ne rien laisser au hasard. C'est là que le TempPro TP972 TempSpike Plus gagne sa place, avec une surveillance continue sur une portée Bluetooth stable de 600 pieds, des sondes codées par couleur faciles à suivre, et un amplificateur LCD qui vous donne des lectures rapides sans avoir besoin d'une application. Arrêtez de deviner et commencez à mesurer, et le magret de canard passera d'intimidant à l'une des choses les plus gratifiantes que vous puissiez mettre dans une assiette.

FAQ
Pourquoi la peau de mon canard n'est-elle pas croustillante ?
Généralement parce que la graisse n'a pas rendu correctement, ou que la chaleur était trop élevée trop tôt.
Quelle est la meilleure température pour le magret de canard ?
Mi-saignant à 130 à 135 °F est idéal pour la tendreté.
Ai-je besoin d'un thermomètre pour le magret de canard ?
Ce n'est pas obligatoire, mais cela améliore grandement la régularité et vous aide à éviter la surcuisson.
Dois-je commencer la cuisson du canard dans une poêle froide ?
Oui. Cela fait fondre la graisse lentement et vous donne une peau meilleure et plus croustillante.
Quelle est la plus grande erreur lors de la cuisson du magret de canard ?
Utiliser une chaleur élevée trop tôt et ne pas contrôler la température.


Commentaires
Vous aimerez peut-être aussi


Produits recommandés