Halloween Party Food Ideas: 10 Spooky Recipes


 288 Comments


Planning a Halloween party? The right food can make your gathering more festive without requiring hours of complicated decorating. From mummy-shaped hot dogs and ghost pizzas to pumpkin-inspired stuffed peppers and spooky desserts, these Halloween party food ideas combine familiar flavors with fun seasonal designs.
Whether you're hosting a family get-together, a neighborhood party, or a Halloween movie night, these 10 recipes offer a mix of appetizers, main dishes, snacks, and desserts. Each recipe includes step-by-step instructions, helpful preparation tips, and cooking guidance to make the process easier.
Table of Contents
10 Easy Halloween Recipes for Parties
Here are 10 Halloween party recipes worth adding to your menu, along with practical tips to help you prepare, cook, and serve them.
Hot Dog Mummies
Best for: Halloween appetizers, kids' parties, and easy finger food
Hot dog mummies are a classic Halloween party snack made with hot dogs and refrigerated crescent dough. The dough becomes golden and flaky in the oven, while small cheese eyes give each mummy a playful finishing touch.
Ingredients
- 8 bun-length hot dogs
- 1 tube (8 ounces) refrigerated crescent dough
- 1 slice white American cheese
- Ketchup or mustard, for decorating

Step-by-step instructions
Step 1: Prepare the oven and dough.
Preheat the oven to 375°F. Line a baking sheet with parchment paper. Unroll the crescent dough, press the seams together to form one rectangle, and cut it lengthwise into eight long strips.
Step 2: Wrap the hot dogs.
Take one strip of dough and wind it around a hot dog. Stretch the dough gently as you wrap, leaving small gaps between some of the strips so the hot dog resembles a mummy's bandages. Leave a little space near one end for the eyes.
Step 3: Bake until golden.
Arrange the wrapped hot dogs on the prepared baking sheet. Bake for about 15 minutes, or until the dough is puffed and golden brown.
Step 4: Add the mummy eyes.
While the hot dogs are baking, cut small circles from the cheese. After removing the hot dogs from the oven, attach two cheese circles to each one with a tiny dab of ketchup. Add a smaller dab of ketchup or mustard to create the pupils.
Helpful tip: Avoid wrapping the dough too tightly. Small gaps help the finished hot dogs look more like bandaged mummies.
Mummy Jalapeño Poppers
Best for: Spicy appetizers and Halloween parties for adults
These mummy jalapeño poppers combine spicy peppers, creamy cheese filling, crisp bacon, and golden pastry. They take a little more preparation than mummy hot dogs, but their Halloween appearance makes them worth the effort.
Ingredients
- 10 medium to large jalapeños
- 4 slices bacon, chopped
- 6 ounces cream cheese, softened, plus 1 heaping tablespoon for decorating
- 1 1/2 cups shredded Cheddar Jack cheese
- 2 scallions, thinly sliced
- 1 garlic clove, finely grated
- 1 tube (8 ounces) refrigerated crescent dough
- 1 large egg, beaten
- Black olives, for the eyes
- Salt, as needed
Step-by-step instructions
Step 1: Prepare the peppers.
Preheat the oven to 400°F and line a baking sheet with parchment paper. Slice the jalapeños in half lengthwise, keeping the stems attached if possible. Use a small spoon to remove the seeds and inner membranes. Wear food-safe gloves if your skin is sensitive to chili peppers.
Step 2: Cook the bacon.
Place the chopped bacon in a skillet over medium heat. Cook for about 10 minutes, stirring occasionally, until browned and crisp. Transfer it to a paper towel-lined plate to drain.
Step 3: Make the filling.
Mix the cooked bacon with the softened cream cheese, Cheddar Jack, scallions, garlic, and a little salt. Stir until evenly combined.
Step 4: Fill and wrap the peppers.
Spoon the cheese mixture into each jalapeño half, smoothing the filling level with the cut edges. Unroll the crescent dough and separate it into rectangles. Seal the diagonal seams, then cut the dough into thin strips. Wrap two strips around each filled pepper, leaving small gaps to resemble mummy bandages.
Step 5: Brush and bake.
Place the poppers on the baking sheet and lightly brush the pastry with beaten egg. Bake for 13–18 minutes, until the pastry is golden and the filling is hot.
Step 6: Add the eyes.
Let the poppers cool slightly. Put the reserved cream cheese into a small resealable bag and snip off a tiny corner. Pipe two small dots onto the wider end of each popper. Press a tiny piece of black olive onto each dot to form the pupils.
Helpful tip: These can be assembled ahead and refrigerated before baking. For the best pastry texture, brush them with egg just before they go into the oven.
Individual Scary White Pizzas
Best for: A Halloween main dish or a444444 customizable party activity
Ghost-shaped white pizzas are a fun alternative to traditional pizza. Prepared pizza dough keeps the process manageable, while ricotta, Parmesan, and mozzarella create a creamy topping. Black olive slices provide simple eyes.
Ingredients
- 1 pound prepared pizza dough
- All-purpose flour, for rolling
- 1 tablespoon olive oil
- 1 garlic clove, finely grated
- 1 cup ricotta cheese
- 1/3 cup grated Parmesan
- 1/2 teaspoon dried Italian seasoning
- 1 1/2 cups shredded mozzarella
- Sliced black olives
- Salt and black pepper
Step-by-step instructions
Step 1: Preheat the oven.
Heat the oven to 450°F. Line two baking sheets with parchment paper.
Step 2: Shape the ghosts.
Divide the dough into four portions. On a lightly floured surface, roll and stretch each portion into an oval about 8–9 inches long. Transfer each piece to the baking sheet, then pull one end outward to form a tapered ghost shape. The outlines do not need to match perfectly.
Step 3: Season and partially bake.
Mix the olive oil and grated garlic in a small bowl. Brush the mixture over the dough and season with salt and pepper. Bake for 10–12 minutes, rotating the baking sheets halfway through, until the crusts are set and lightly golden.
Step 4: Add the cheese topping.
Stir together the ricotta, Parmesan, and Italian seasoning. Spread the mixture over each pizza, leaving about half an inch of crust uncovered. Sprinkle the mozzarella on top.
Step 5: Finish baking and decorate.
Return the pizzas to the oven for about 5 minutes, or until the cheese has melted and the toppings are hot. Add two black olive slices to each pizza to make the eyes, then serve warm.
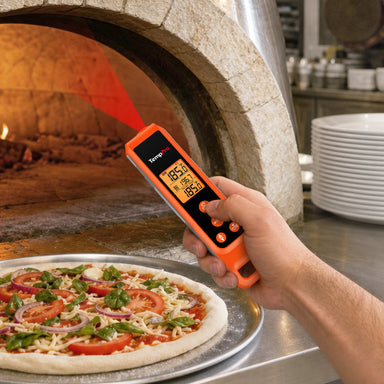
Helpful tip: If you are using a pizza oven instead of a conventional oven, check the cooking surface temperature with an infrared thermometer designed for surface readings. An infrared thermometer measures the surface, not the internal temperature of food. Follow your oven manufacturer's recommended cooking temperature.
Eyeball Meatballs
Looking for a Halloween dish that is creepy enough to get everyone talking? These eyeball meatballs are a fun choice for your party table. Tender beef meatballs sit in rich marinara sauce, while melted mozzarella and black olive slices turn each one into a spooky edible eyeball. Serve them as bite-sized appetizers or pair them with spaghetti for a filling Halloween dinner.
Ingredients
- 1 lb ground beef
- 1 egg
- 1/3 cup breadcrumbs
- 2 tbsp grated Parmesan cheese
- 2 garlic cloves, finely chopped
- 1 tsp Italian seasoning
- Salt and black pepper, to taste
- 2 cups marinara sauce
- Mozzarella cheese, cut into small circles
- Black olives, sliced into rounds

Step-by-step instructions
Step 1: Mix the Meatball Ingredients
Add the ground beef, egg, breadcrumbs, Parmesan, garlic, Italian seasoning, salt, and pepper to a mixing bowl. Combine everything just until the mixture holds together. Mixing too much can make the finished meatballs firm instead of tender.
Step 2: Roll into Balls
Shape the mixture into evenly sized meatballs, about 1½ inches across. Keeping them similar in size helps them cook at roughly the same rate.
Step 3: Brown and Simmer
Warm a little oil in a skillet over medium heat. Add the meatballs and turn them as they cook, allowing the outside to brown. Pour in the marinara sauce, lower the heat, and cover the skillet. Let the meatballs simmer until fully cooked, adjusting the time for their size.
Step 4: Check That the Beef Is Cooked Through
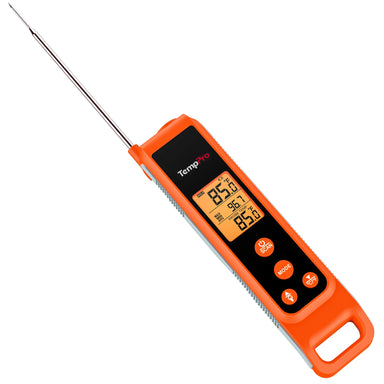
Before adding the decorations, check the center of a meatball with an instant-read thermometer. Ground beef needs to reach 160℉. The TempPro TempSwift ELITE TP620 Instant-Read Thermometer can help you check the temperature quickly, so you don't have to guess based on the outside color. Insert the probe into the center of the meatball without touching the pan.

Step 5: Add the Spooky Eyes
Place a mozzarella circle on top of each meatball, then add a black olive slice in the middle to create the pupil. Cover the skillet for another minute or two, just until the cheese softens and settles over the meatballs.
Step 6: Bring Them to the Table
Arrange the meatballs on a serving platter with marinara sauce around them. Add toothpicks for easy party snacking, or serve them over spaghetti if you want a more substantial meal.
Halloween Serving Tip
For an extra eerie look, spoon a little marinara sauce around the meatballs so the white cheese eyes stand out. If you make them ahead, refrigerate the meatballs within two hours and reheat leftovers to 165℉ before serving.
Pumpkin Cheese Ball
Best for: A no-bake appetizer or party snack board
This pumpkin-shaped cheese ball gets its orange color from crushed cheese puffs rather than pumpkin. Cream cheese and Cheddar form the base, while a bell pepper stem creates the pumpkin's signature look.
Ingredients
- 2 pounds cream cheese, softened
- 3 cups shredded Cheddar
- 3 cups orange cheese puffs
- 1/4 cup chopped chives
- 1 bell pepper with a long stem
- Salt and black pepper
- Crackers and sliced bell pepper, for serving
Step-by-step instructions
Step 1: Crush the cheese puffs.
Place the cheese puffs in a food processor and pulse until they become fine crumbs. Spread the crumbs on a rimmed baking sheet or a large plate.
Step 2: Mix the cheese base.
In a large bowl, combine the softened cream cheese, shredded Cheddar, chives, about 1 teaspoon salt, and 1/4 teaspoon black pepper. Mix until the ingredients are evenly distributed.
Step 3: Shape the pumpkin.
Scoop the mixture onto a sheet of plastic wrap. Shape it into a ball, then flatten the top slightly. Use the tip of a butter knife to press vertical grooves down the sides, creating the ridges of a pumpkin.
Step 4: Add the orange coating.
Roll the cheese ball in the crushed cheese puffs, pressing gently so the crumbs stick to the surface.
Step 5: Finish and serve.
Carefully remove the bell pepper stem with a paring knife and place it on top of the cheese ball. Slice the remaining pepper and arrange it around the cheese ball with crackers.
Helpful tip: Make the cheese ball ahead of time and refrigerate it until firm. Add the crunchy coating closer to serving time if you want it to retain more texture.
Jack-O'-Lantern Jambalaya Stuffed Peppers
Best for: A hearty Halloween main dish
For a more filling option, these jack-o'-lantern peppers are stuffed with Cajun-style jambalaya rice and andouille sausage. Orange and green peppers make a colorful presentation, and their carved faces add a festive touch.
Ingredients
- 6 large bell peppers: 3 orange and 3 green
- 1/2 pound andouille sausage, sliced
- 1 1/2 cups medium-grain white rice
- 1/2 large white onion, diced
- 1/2 cup diced green bell pepper
- 1/2 cup diced celery
- 1 1/2 tablespoons Cajun seasoning
- 1 1/2 cups chicken stock
- 2 tablespoons unsalted butter
- 1/2 cup chopped green onions
- Vegetable oil, salt, and bay leaves

Step-by-step instructions
Step 1: Brown the sausage.
Heat 2 tablespoons of vegetable oil in a large Dutch oven over medium-high heat. Add the sliced andouille sausage and cook for about 4 minutes, until it begins to brown.
Step 2: Cook the vegetables and rice.
Add the diced onion, green bell pepper, celery, Cajun seasoning, and salt. Cook for 8–10 minutes, stirring occasionally, until the vegetables soften. Add the butter and rice, stirring for about 1 minute so the grains become coated.
Step 3: Simmer the jambalaya.
Add the bay leaves, chicken stock, and 1 1/2 cups water. Bring the mixture to a boil, cover, and reduce the heat. Simmer for 25-30 minutes, until the liquid has been absorbed and the rice is tender. Remove the bay leaves and fold in the green onions.
Step 4: Prepare the pepper lanterns.
Preheat the oven to 350°F. Cut the tops off the whole peppers and save them as lids. Remove the seeds and inner ribs. Trim a small amount from the bottoms if needed to help the peppers stand upright, taking care not to cut through them. Carve a jack-o'-lantern face into one side of each pepper.
Step 5: Stuff and bake.
Fill the peppers with the cooked jambalaya. Arrange them in a baking dish, replace their tops, and pour about 1/2 cup water into the bottom of the dish. Cover with foil and bake for about 45 minutes, until the peppers are crisp-tender and the filling is heated throughout.
Helpful tip: The jambalaya can be prepared ahead, making the final assembly easier on party day. Keep cooked rice refrigerated until you are ready to assemble and bake the dish.
Halloween Candy-Coated Apples
Best for: Halloween dessert tables and make-ahead treats
Candy-coated apples can be decorated as mummies, spiders, cats, skeletons, werewolves, or ghosts. This version uses melted candy coating rather than a boiled sugar syrup, so it is a convenient option for cooks who want colorful decorations without making traditional hard candy.
Ingredients
- 6 apples
- 3 cups white candy melts
- Lollipop sticks or wooden dowels
- Black candy melts or black icing
- Mini marshmallows
- Candy eyes and small candies, as desired
Step-by-step instructions
Step 1: Prepare the apples.
Wash and dry the apples thoroughly. Insert a lollipop stick or dowel into the stem end of each apple. Line a baking sheet with parchment paper.
Step 2: Melt the coating.
Place the white candy melts in a microwave-safe bowl. Heat in 30-second intervals, stirring after each interval, until smooth. Avoid overheating, which can make the coating difficult to work with.
Step 3: Coat the apples.
Dip each apple into the melted candy, turning it to cover the surface. Let excess coating drip back into the bowl. Place the apples on the lined baking sheet and allow the coating to set before adding decorations.
Step 4: Choose a Halloween design.
For mummies, attach candy eyes with a little melted coating, then stretch softened marshmallow into thin strands and wrap them around the apple. For spiderwebs, pipe a spiral of melted black candy onto a still-wet white coating and drag a skewer outward to create web lines. For ghosts, let the coating set and pipe on eyes and a mouth with black icing.
Step 5: Let the decorations set.
Leave the apples on the parchment until the coating is firm. If your kitchen is warm, refrigerate them briefly to help the decorations set.
Helpful tip: This particular recipe uses ready-made candy melts, not a sugar syrup that must reach a specific temperature. A candy thermometer is therefore not necessary for this version. If you choose a traditional hard-candy apple recipe instead, follow that recipe's syrup-temperature instructions carefully.
Caramel Popcorn
Best for: Halloween movie nights, snack bowls, and party favors
Caramel popcorn adds a sweet, crunchy option to a Halloween snack table. This version combines popcorn and roasted peanuts with a brown-sugar caramel coating. The key is heating the syrup to the correct temperature before pouring it over the popcorn.
Ingredients
- 1/2 cup popcorn kernels, popped
- 2 cups roasted peanuts
- 1 1/4 cups packed golden brown sugar
- 1/4 cup unsalted butter
- 1/4 cup light corn syrup
- 2 teaspoons vanilla extract
- 1/2 teaspoon salt
- 1/4 teaspoon baking soda
Step-by-step instructions
Step 1: Prepare the popcorn and pan.
Preheat the oven to 250°F. Generously butter a large, heavy baking pan. Combine the freshly popped popcorn and roasted peanuts in the pan, then place it in the warm oven while preparing the caramel.
Step 2: Heat the caramel syrup to the right temperature.
Combine the brown sugar, butter, and corn syrup in a heavy saucepan. Stir over medium-low heat until the sugar dissolves and the butter melts. Attach a candy thermometer to the side of the pan, making sure the sensing tip sits in the syrup without touching the bottom. Bring the mixture to a boil and heat it to 255°F, following the original recipe's instructions.
A digital candy thermometer such as the TempPro TempDip PLUS TP510 Candy Thermometer helps you monitor the syrup temperature more precisely than relying on color or cooking time alone. This matters when making caramel because the temperature affects the final coating's texture. Keep your hands and face away from the bubbling syrup, which can cause serious burns.

Step 3: Heat to the target temperature.
Increase the heat and bring the syrup to a boil. Let it boil without stirring until the thermometer reads 255°F, which takes about 4 minutes in the original recipe. Brush any sugar crystals from the sides of the pan with a wet pastry brush if needed. Remove the pan from the heat.
Step 4: Finish the caramel.
Stir in the vanilla, salt, and baking soda. The mixture will bubble, so use caution and keep your face and hands away from the pan. Gradually pour the hot syrup over the warm popcorn and peanuts, stirring carefully to coat them as evenly as possible.
Step 5: Bake until dry and crunchy.
Bake for about 1 hour and 30 minutes, stirring frequently, until the caramel coating feels dry. Remove the pan from the oven and loosen the mixture from the bottom with a metal spatula. Let the popcorn cool completely before breaking it into clusters.
Helpful tip: A candy thermometer is especially useful here because caramel consistency depends on temperature, not just color or boiling time. The syrup is extremely hot, so never touch or taste it while it is cooking. Store the cooled popcorn in an airtight container.
Black Magic Cake
Best for: Chocolate lovers and spooky Halloween desserts
Black Magic Cake is a deep chocolate cake that makes a dramatic base for Halloween decorations. The dark frosting can be finished with a marshmallow spiderweb or mummy-style strands for a spooky but edible centerpiece.
Ingredients
- 2/3 cup vegetable oil, plus more for the pans
- 1 cup Dutch-process cocoa powder
- 1 cup boiling water
- 2 cups granulated sugar
- 1 3/4 cups all-purpose flour
- 2 teaspoons baking powder
- 1 teaspoon fine salt
- 1 cup whole milk
- 2 large eggs
- 1 tablespoon vanilla extract
For the frosting and decoration, you'll also need heavy cream, semisweet chocolate, additional cocoa powder, espresso powder, butter, confectioners' sugar, mini marshmallows, and candy eyes or spiders.

Step-by-step instructions
Step 1: Prepare the pans and cocoa.
Preheat the oven to 350°F. Grease two 9-inch round cake pans and line their bottoms with parchment paper. Stir the cocoa powder into the boiling water until smooth, then let it stand for about 5 minutes to deepen the chocolate flavor.
Step 2: Mix the batter.
Whisk the sugar, flour, baking powder, and salt in a large bowl. In another bowl, combine the cocoa mixture with the oil, milk, eggs, and vanilla. Pour the wet ingredients into the dry ingredients and stir until the batter is smooth. Divide it evenly between the pans.
Step 3: Bake and cool.
Bake for 30-40 minutes, until the cakes spring back lightly when pressed and a toothpick inserted in the center comes out clean. Let the cakes cool completely before frosting.
Step 4: Make the chocolate frosting.
Warm the heavy cream in a double boiler until steaming. Whisk in the cocoa powder, chopped semisweet chocolate, espresso powder, vanilla, and a pinch of salt until smooth. Stir in the butter until melted, then add the confectioners' sugar. Let the frosting cool completely before assembling the cake.
Step 5: Assemble the cake.
Place one cake layer on a serving plate and spread frosting over the top. Add the second layer and cover the top and sides with the remaining frosting.
Step 6: Add a spooky finish.
Microwave the mini marshmallows in a microwave-safe bowl for about 1 minute, until puffed and soft. Let them cool slightly. With lightly greased hands, stretch small portions into thin strands. Arrange the strands across the cake to create a spiderweb, or place them in parallel lines to resemble mummy bandages. Finish with candy eyes or a candy spider.
Helpful tip: Make sure the cake is completely cool before frosting it. Warm cake can soften the frosting and make the layers slide.
Easy Jack O' Lantern Cake
Best for: A Halloween birthday party or a festive dessert centerpiece
This pumpkin-shaped cake uses boxed cake mix and instant pumpkin-spice pudding to simplify the baking process. Instead of needing a special pumpkin-shaped pan, you can cut and arrange round cakes to create the pumpkin outline.
Ingredients
- 1 box (15.25 ounces) yellow cake mix
- 1 box (3.4 ounces) pumpkin-spice instant pudding mix
- 1/2 cup vegetable oil
- 4 large eggs
- 2 cups marshmallow cream
- 10 tablespoons unsalted butter, softened
- 3 cups confectioners' sugar
- Red and yellow food coloring
- 1/2 cup dark or bittersweet chocolate chips
- 1 long green sour belt candy
Step-by-step instructions
Step 1: Bake the cake layers.
Preheat the oven to 350°F and grease two 8-inch round cake pans. Whisk together the cake mix, pudding mix, oil, eggs, and 1 1/2 cups water until smooth. Divide the batter between the pans and bake for 25-30 minutes, until a toothpick inserted in the center comes out clean. Cool the cakes completely.
Step 2: Make the orange frosting.
Beat the marshmallow cream and softened butter until fluffy, about 3 minutes. Add the confectioners' sugar gradually, mixing until smooth. Blend in the red and yellow food coloring until the frosting turns a bright orange.
Step 3: Create the pumpkin shape.
Place one cake layer on a large cutting board or serving tray. Cut a round from the center of the second cake, then divide the remaining cake into curved pieces. Arrange the pieces around the first layer to create a pumpkin silhouette, using smaller sections to form the lower shape and stem.
Step 4: Prepare the chocolate face.
Melt the chocolate chips in a heatproof bowl set over gently simmering water, ensuring the bowl does not touch the water. Transfer the melted chocolate to a piping bag or a small resealable bag with a tiny corner cut off. Pipe two triangular eyes and a toothy mouth onto parchment paper. Refrigerate until firm.
Step 5: Frost the cake.
Spread orange frosting over the assembled cake, covering the top, sides, and joins between the pieces. Smooth the frosting into vertical ridges to make the cake resemble a pumpkin.
Step 6: Add the face and stem.
Carefully place the hardened chocolate eyes and mouth onto the frosting. Use melted chocolate to coat the cake stem and let it firm up in the refrigerator before placing it on top. Add the green sour belt beside the stem to resemble a vine.
Helpful tip: Chill the chocolate decorations until firm before handling them. This makes it easier to transfer them to the cake without breaking.
Final Thoughts
A great Halloween menu doesn't need to be complicated. Mummy hot dogs and jalapeño poppers bring playful appetizers to the table, stuffed peppers provide hearty main dishes, and caramel popcorn, candy-coated apples, and pumpkin-shaped cakes finish the party with festive treats.
Choose a few recipes that fit your guest list and preparation time. You can prepare some components ahead, leave the final decorating until party day, and use a reliable thermometer whenever a recipe depends on reaching a specific cooking temperature. That way, your Halloween spread can be both memorable and safely prepared.


Comments



Recommended Products