How to Make Birria with Beef: 6 Essential Steps


 288 Comments


The best way to tell if your birria is made well is the first time you put a fork into it. The meat should be easy to tear apart into small strings. The longer cooking time, along with the proper cut of beef and the right cooking liquids, allow you to achieve a perfectly cooked, fall apart beef product.
There are many ways to prepare beef for eating, however, you will find that the slow cooking method is far superior in achieving the type of tender beef needed to make great birria. If you try to hurry the cooking process, the end result may be cooked through beef, but it could still be tough. On the flip side, if you take too long and let the beef get too tender, then you will lose the juiciness that you are attempting to retain.
To create that perfect balance of tenderness and juiciness, you will need to select the correct cut of beef and use a good quality cooking liquid. In addition to selecting the right ingredients, you will also need to pay close attention to your cooking temperature. This allows the proteins within the beef to break down slowly and evenly which results in tender beef.
Below are eight steps required to make birria using beef that is so tender it practically falls off a fork.
Table of Contents
- Step #1: Select the Right Cuts of Beef
- Step #2: Cut the Beef into Larger Than Bite-Size Pieces
- Step #3: Create a Flavorful Birria Sauce
- Step #4: Cook Using Low Temperatures Over Long Periods of Time
- Step #5: Keep Track of Your Internal Beef Temperature Using a Meat Thermometer
- Step #6: Monitor the Cooking Process
- FAQs About Cooking Birria
Step #1: Select the Right Cuts of Beef
Birria is not a dish where you should immediately go for the leanest or most expensive cuts of beef. Cuts of beef that have a lot of marbled fat (fat within the muscle) work very well for birria. The reason for this is that the fat melts and adds flavor and richness to both the meat and the consommé.
In order to find a cut of beef that fits these requirements, look for beef that has visible marbling throughout the cut. A cut with one large section of external fat is less desirable. Although, very lean cuts of beef can be cooked in a flavorful liquid, they do not add the same qualities that slow-cooking the beef does.
Since you want to develop the connective tissues in the beef as part of your slow-cooking process, choosing a slightly tougher cut is beneficial. As long as you have sufficient controlled cooking time, it can help create that fork-tender texture you desire.
Step #2: Cut the Beef into Larger Than Bite-Size Pieces
Cutting the beef before cooking allows for more surface area on each piece of meat for your sauce and seasonings while also helping to simplify handling the meat. However, do not chop everything into tiny cubes.
Smaller pieces have more exposed surface area compared to their size and can lose more moisture during an extended cook. Divide the beef into somewhat larger pieces and attempt to have them roughly equal in size. They don’t have to be perfect cubes; having mostly uniform sized chunks gives you better control, yet still plenty of surface area for the birria sauce.

Step #3: Create a Flavorful Birria Sauce
Only half of what makes birria so unique is the tenderness of the beef. The other half is a deep-flavored cooking liquid that turns into your consommé.
Recipes may vary based on the specific type of birria being prepared, but common components found in birria sauces include dried chiles combined with items such as garlic, spices, herbs, tomatoes, vinegar and/or broth. Your selection of ingredients may be determined by the type of birria you plan on preparing.
Regardless of your combination of ingredients, your primary concern is developing a sauce flavorful enough to season both the beef and liquid it surrounds. Blend your sauce well and coat your beef with it prior to starting the long cooking process. During this cooking period, the juices from the meat and rendered fat mix with your seasoned liquid to develop your rich consommé that can be either served with your meat or used as a dip for your birria tacos.
Step #4: Cook Using Low Temperatures Over Long Periods of Time
Once your beef has been placed into its cooking liquid, patience becomes one of your greatest tools.
Increasing the heat is not always going to speed up your cooking time. What we are trying to accomplish is giving our meat enough time under controlled cooking conditions for its connective tissue structure to gradually soften.
Therefore, it stands to reason why relying solely upon cooking time cannot guarantee successful results. A recipe may instruct you to cook your birria for a set amount of time; however, every chunk of beef differs in terms of thickness, fat content and connective tissue composition. Cooking equipment is also variable.
Rather than considering time as a definitive indicator that your beef has achieved your desired level of tenderness, consider using time as a guideline. Our goal is not merely achieving an internal temperature deemed safe; our goal is achieving tender beef.
Step #5: Keep Track of Your Internal Beef Temperature Using a Meat Thermometer
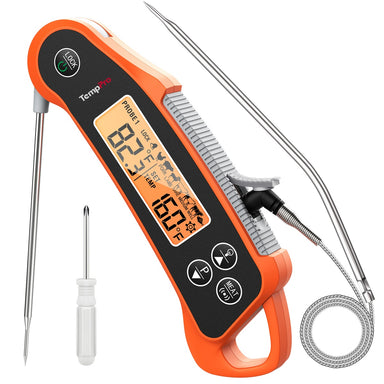
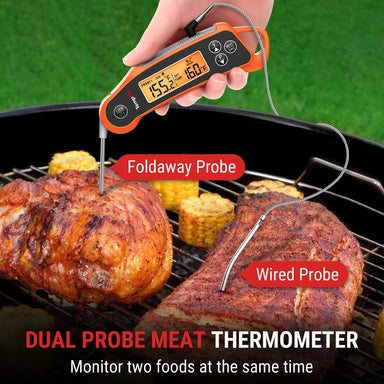
During prolonged cooking processes, it can be hard to determine whether your meat is becoming tender due to the fact that it’s impossible to visually inspect your interior-most pieces of beef. Therefore, utilizing a leave-in digital thermometer, such as the TempPro TempTrack CORE TP16 Digital Meat Thermometer for Cooking, provides incredible insight regarding what’s occurring within the thickest piece(s) of beef during cooking.
This means you’re able to continue tracking the internal temperature of your meat throughout its entire cooking process instead of constantly removing it to check its temperature. The 6.5 inch food-grade stainless steel probe can be inserted into your thickest pieces of beef while a 40 inch stainless steel mesh cable connects the probe to the thermometer base located outside your oven.
With an operating temperature range of 32°F-572°F with +/- 1.8℉accuracy, this tool provides invaluable data concerning how quickly or slowly your internal temperature increases throughout your cooking process.
Using this data provides an additional measure of confidence when determining when you should begin evaluating your birria for tenderness.

Step #6: Monitor the Cooking Process
You don’t have to stand next to your oven waiting for your thermometer reading. Included with the purchase of the TempPro TempTrack CORE TP16 is a programmable temperature alert system that will alert you once your chosen internal temperature has been reached.
In addition, this unit comes equipped with preset temperature settings developed by USDA for various types of food. These presets can be modified based on your individual preferences and recipes.
Upon reaching the chosen internal temperature setting, the thermometer will beep.
Additionally, the TempPro TempTrack CORE TP16 has built-in timers that will run for up to 99 hours & 59 minutes. This feature enables you to monitor both temperature and cooking time simultaneously during a long birria cooking process.
Utilizing both time and temperature eliminates much of the unknown variables associated with a long cook.
FAQs About Cooking Birria
What is the best beef for birria?
Beef chuck is an excellent option because its fat and connective tissue respond well to long cooking. Other slow-cooking beef cuts can also work depending on your recipe.
Why is my birria beef still tough?
If the beef is cooked but still difficult to pull apart, it may need additional time for its connective tissue to soften. Continue checking both temperature and physical tenderness.
Can I leave the TempPro TempTrack CORE TP16 probe in the meat while it cooks?
Yes. The TempPro TempTrack CORE TP16 is designed as a leave-in cooking thermometer. Its 6.5-inch stainless steel probe connects to the external thermometer using a 40-inch stainless steel mesh cable.
What temperature range does the TempPro TempTrack CORE TP16 measure?
The TempPro TempTrack CORE TP16 measures from 32°F to 572°F with ±1.8°F accuracy. The probe can withstand temperatures up to 716°F.

Does the TempPro TempTrack CORE TP16 have an alarm?
Yes. You can program a target temperature, and the TempPro TempTrack CORE TP16 will beep when the food reaches it. It also includes a timer that runs for up to 99 hours and 59 minutes.